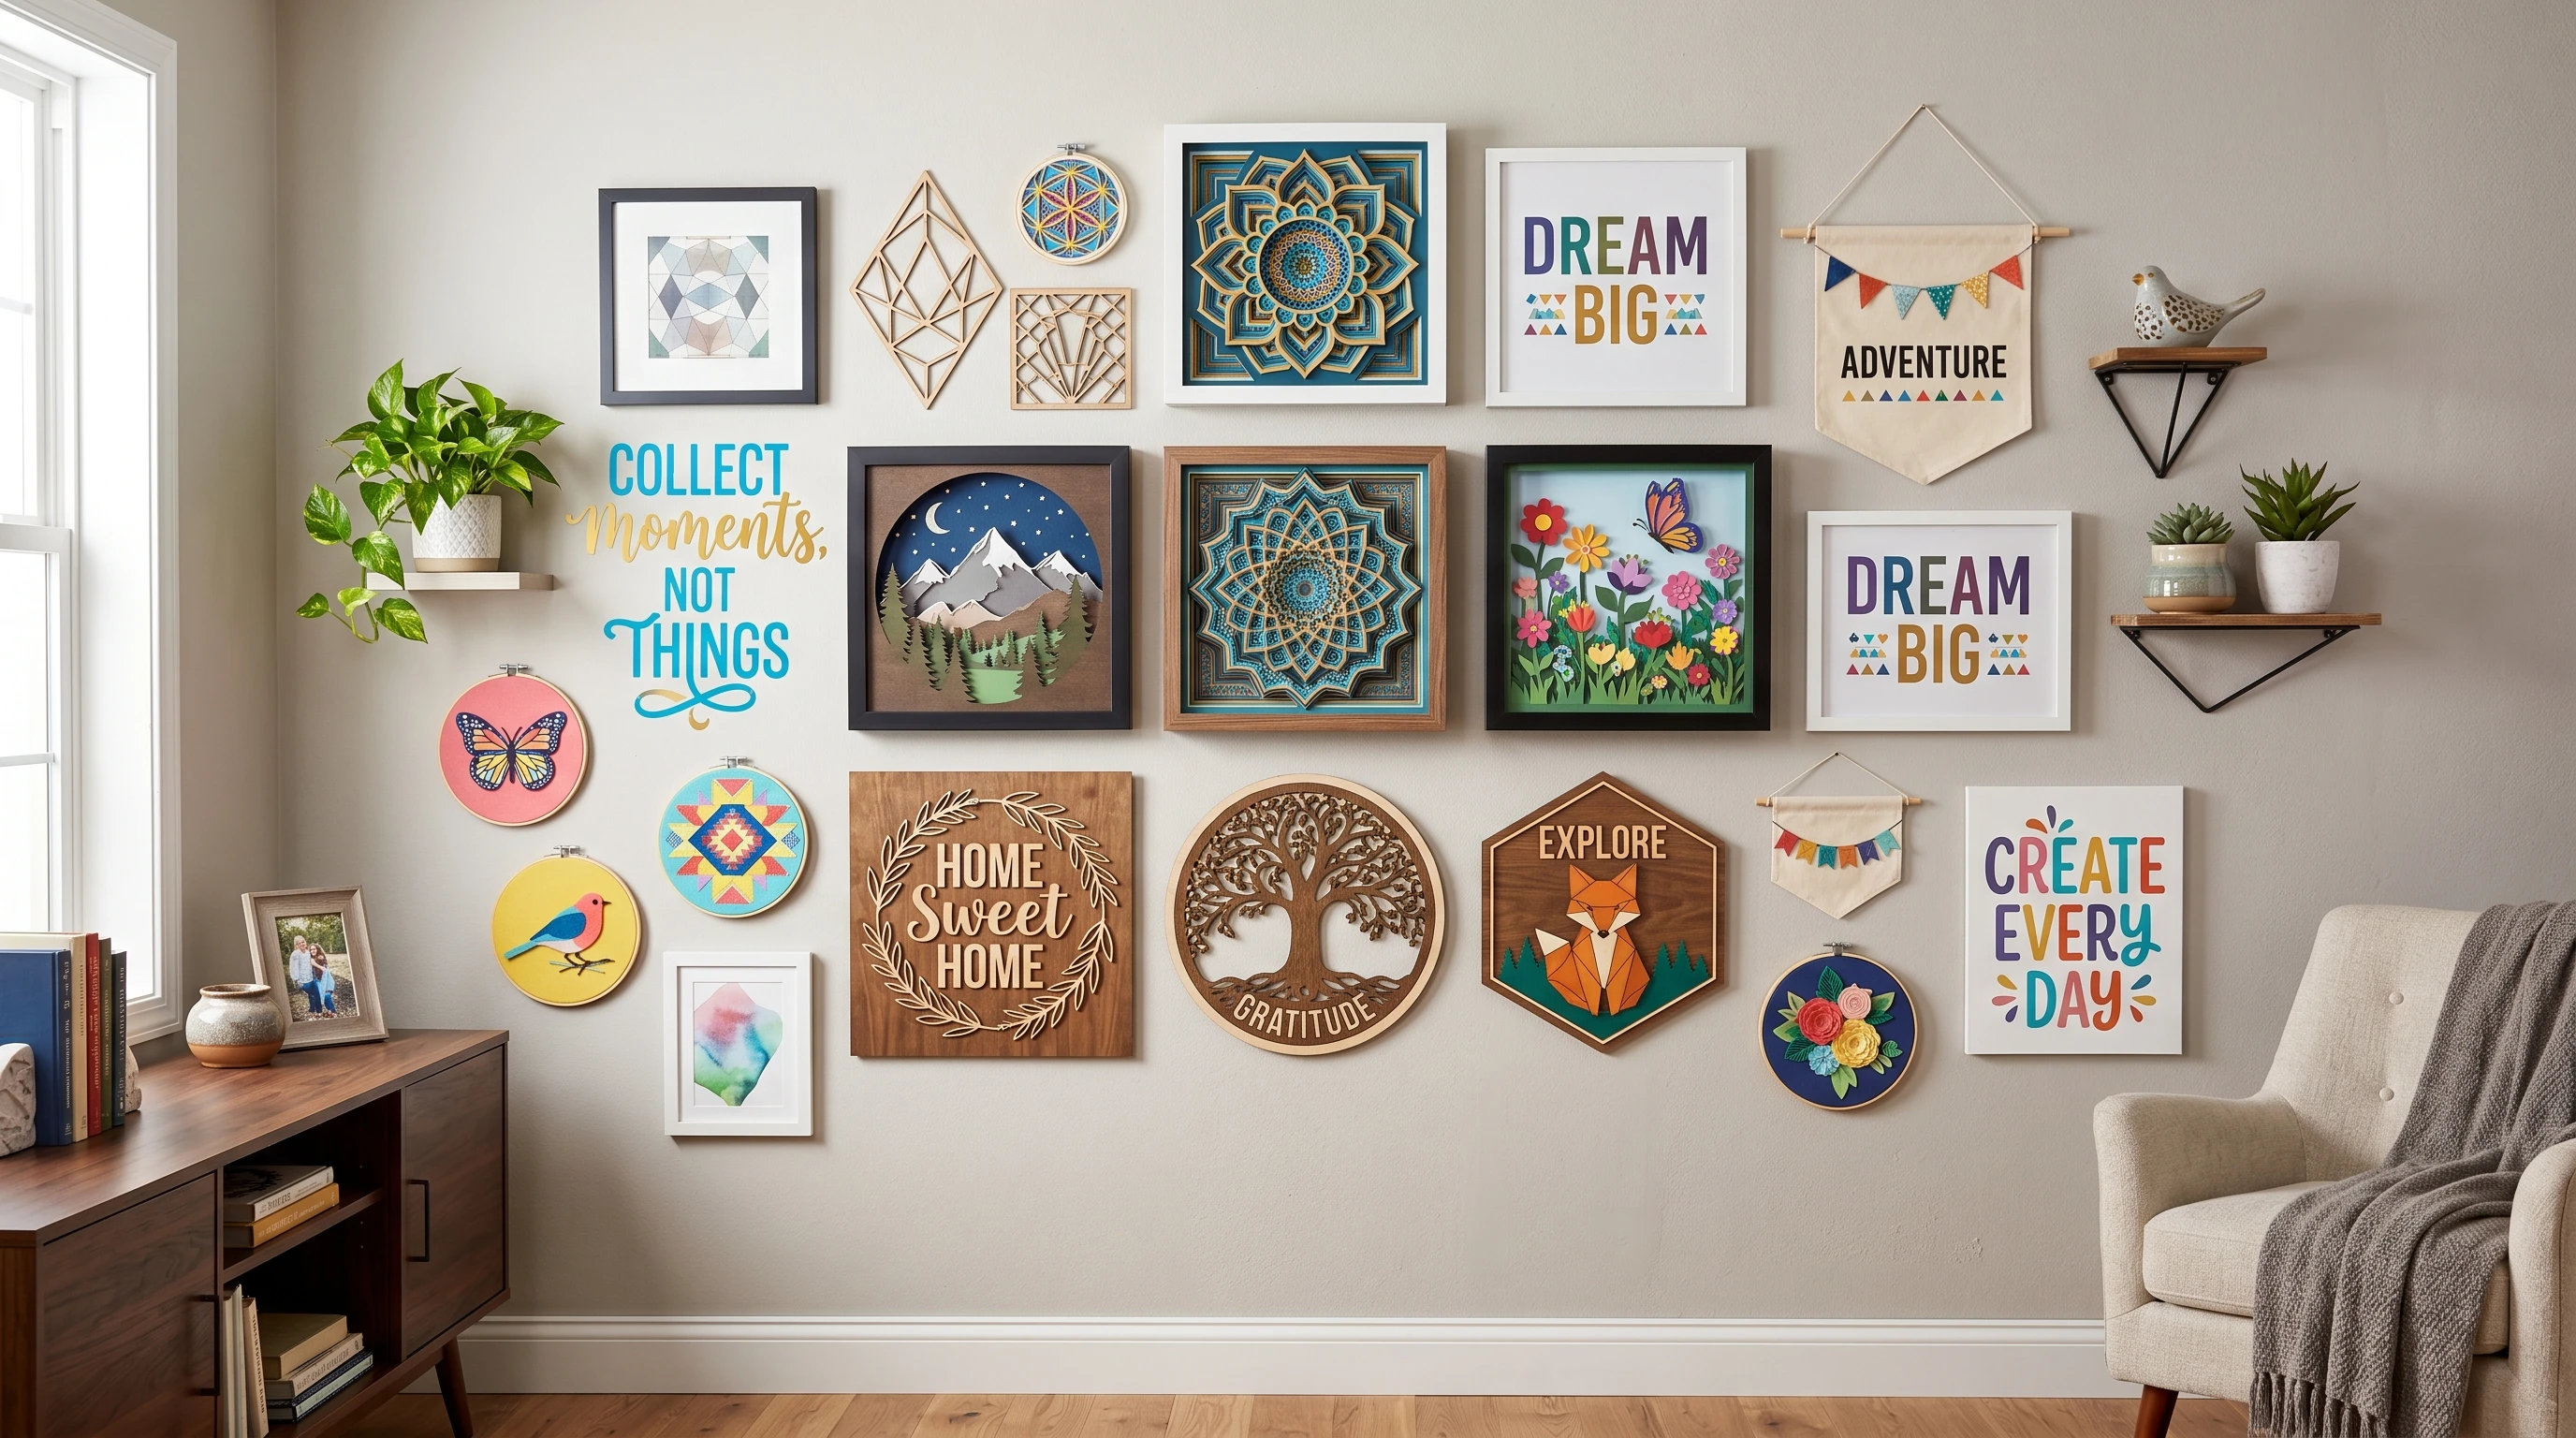
 If you have a Cricut Maker 3 at home, you know just how addictive making custom wall art can be. There’s something satisfying about designing a piece, watching the machine work its magic, and then hanging up a finished creation for everyone to see. Wall art projects aren’t just for super crafty folks; with the right materials, anyone can make décor that looks store bought and totally unique.
If you’re new to Cricut projects or just want some inspiration, I’ve rounded up some of my favorite wall art ideas that work really well with the Cricut Maker 3. Whether you want something quick and easy, a statement sign, or art you can personalize, these project picks show off what this machine can do.
This article covers ten clever wall art projects made with the Cricut Maker 3, including what makes each idea special and a few tips to nail each look. These ideas are great for anyone wanting to refresh their space, give a handmade gift, or just see what’s possible with a Cricut and a bit of creativity.
1. Custom Vinyl Quote Decals
Creating wall quote decals with removable vinyl is one of the most popular Cricut wall art projects, and for good reason. With the Cricut Maker 3’s precise cutting, it’s straightforward to make elegant script lettering or bold block fonts. Choose a favorite quote, cut out the words, and use transfer tape to stick it onto your wall in a clean and straight line.
- Pick colors that match your room.
- Try using metallic or holographic vinyl for added flair.
- Great in entryways, bedrooms, or even the kitchen.
2. Layered Paper Shadow Boxes
Layered paper shadow boxes look super impressive but aren’t all that difficult once you get the hang of it. By stacking several intricately cut shapes and designs, you get a cool dimensional effect that pops under glass. The Cricut Maker 3 makes it easy to cut even the finest details out of cardstock.
- Pick a theme like nature, cityscapes, or geometric patterns.
- Use foam tape between each layer to add depth.
- Choose colors that contrast to make the design stand out.
3. Personalized Name Signs
Name signs add a personal touch to kids’ bedrooms, nurseries, or even home offices. With Cricut Maker 3, it’s possible to cut out names in wood, chipboard, or heavy cardstock. You can also use iron on vinyl on canvas for a soft and trendy look.
- Experiment with script and block fonts.
- Paint or stain wood cutouts for a custom finish.
- Layer colors for a fun, playful effect.
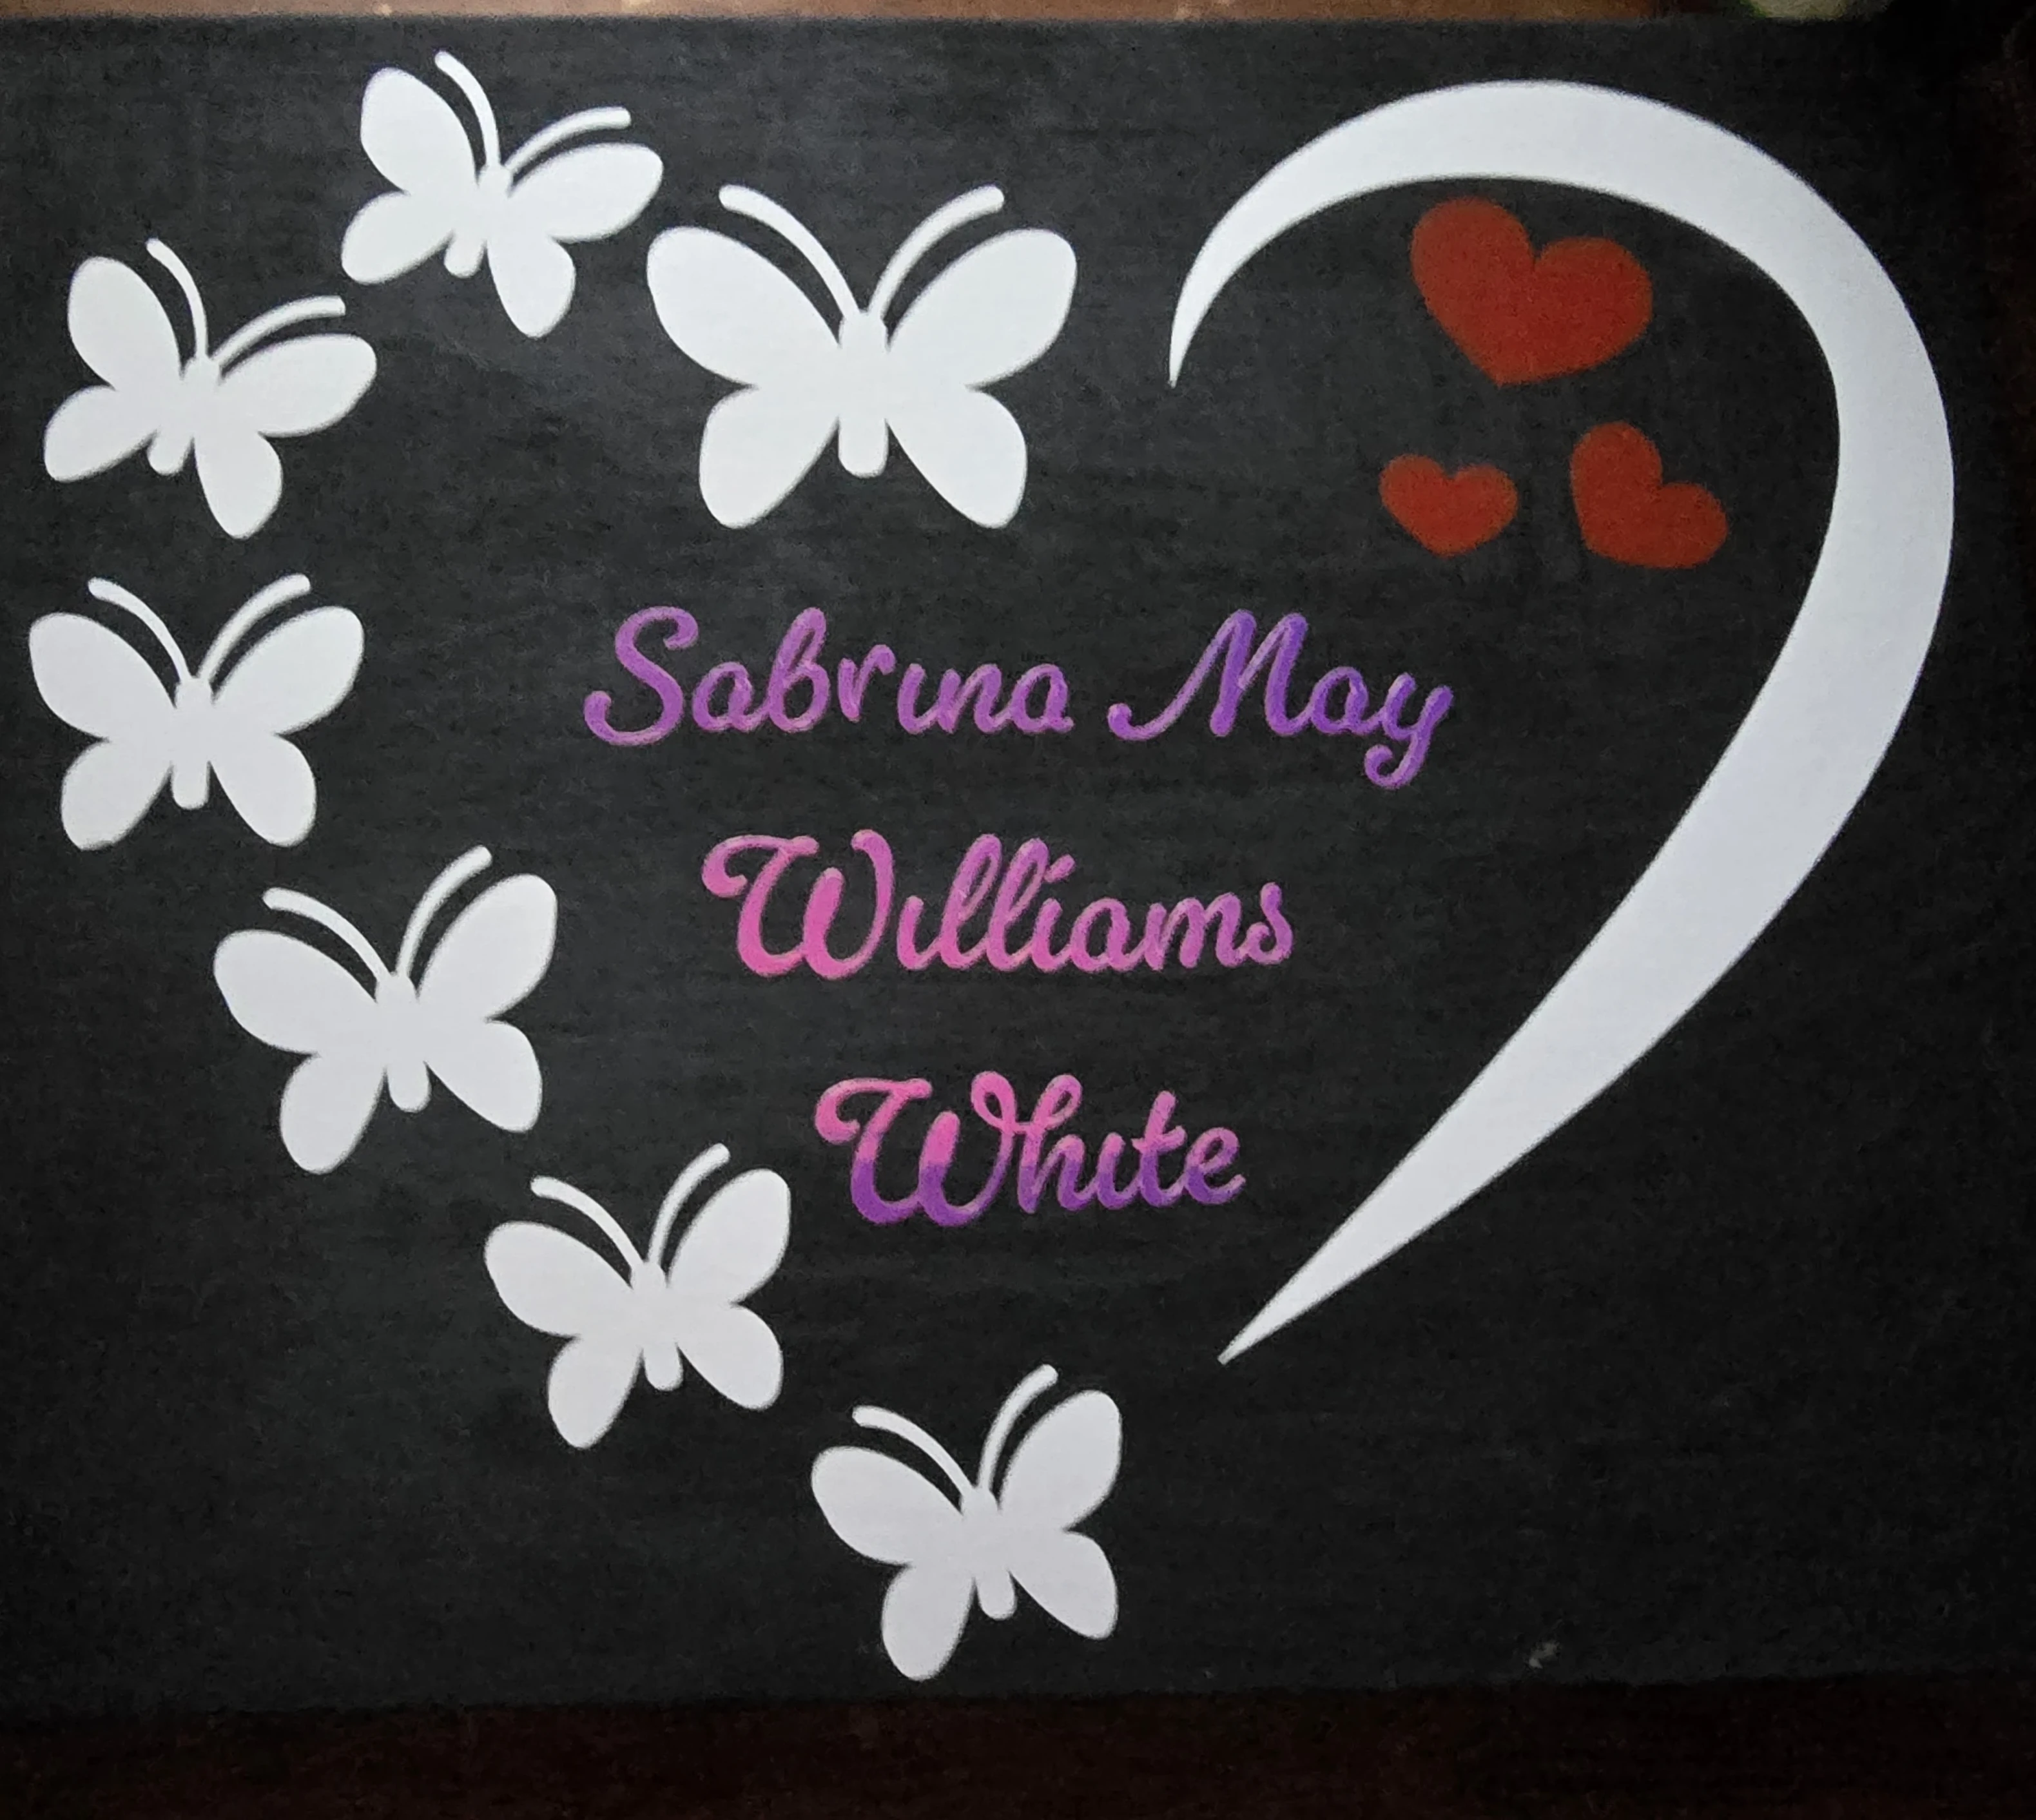 This is a sign that my granddaughter and I designed one afternoon to put on her door.
4. Modern Stencil Art
Stencils are a classic wall art choice, but the Cricut Maker 3 lets you design stencils that are much more intricate or customized than what you’ll find at the craft store. Use stencil vinyl or stencil film to cut your pattern, then roll paint over a blank canvas or straight onto your wall. This works well for repeating patterns or unique designs.
- Try repeating geometric shapes or mandalas.
- Use metallic paint for a modern touch.
- Clean stencil edges using a foam roller with very little paint on it.
5. Faux Canvas Wall Hangings
If you want the look of canvas art without an expensive print, iron on vinyl is very handy. The Cricut Maker 3 cuts out your design, quote, or illustration from iron on material, and you can use a heat press or iron to apply it to a blank canvas. This is great for trendy minimalist line drawings or abstract shapes.
- Pre stretch your canvas for a neat look.
- Add tassels or fringe to the bottom edge for a boho vibe.
6. Wood Veneer Wall Plaques
The Maker 3 isn’t just for paper and vinyl; it can handle wood veneer sheets, too. Cutting out shapes, words, or even abstract designs in thin wood lets you make wall plaques that look professional. Finish with some wood stain or paint, and use adhesive strips to hang them up.
- Circle or hexagon shapes look modern and stylish.
- Combine veneer with vinyl overlays for a custom touch.
- Seal the wood for long lasting color.
7. Fabric Appliqué Hoop Art
Embroidery hoops aren’t just for thread art; use the Cricut Maker 3’s rotary blade to cut detailed shapes from felt or cotton. Arrange them inside a hoop, glue or sew the layers down, and you’ve got playful or elegant wall art with a handmade, textile feel.
- Mix patterns for a cheerful, eclectic look.
- Create floral scenes or woodland creatures by layering small pieces.
8. 3D Butterfly or Flower Installations
Wall art doesn’t have to be flat. The Cricut Maker 3 can cut dozens of butterflies, flowers, or abstract shapes from cardstock or pearl paper. Fold the wings or petals a little, then stick them to the wall with gentle adhesive to create a sculptural, 3D effect.
- Arrange shapes in a swirling pattern for movement.
- Use tone on tone colors for subtle drama.
9. Map Silhouette Art
If you love travel or want to commemorate a favorite city, the Cricut Maker 3 does a great job with map outlines. Find a map of a state, country, or city, convert it for your Cricut, and cut it out of vinyl, paper, or even thin wood. Mount it on a contrasting backing for an art piece that’s meaningful and eye catching.
- Add a heart or marker for a special spot.
- Frame the map for a polished look.
10. Seasonal or Holiday Wall Banners
Mix up your wall décor fast with DIY banners. The Maker 3 is perfect for cutting pennant shapes, letters, or themed decorations out of felt, cardstock, or faux leather. String them onto twine for easy, switchable art; think leaves for autumn, hearts for Valentine’s Day, bunnies for spring, or stars for the Fourth of July.
- Layer different textures for a rich look.
- Save your banner pieces to reuse every year.
Tips for Success with Cricut Wall Art
The Cricut Maker 3 opens up a lot of options, but a few tricks help every project turn out better:
- Use the right blade and materials setting, especially for heavier surfaces.
- Test designs on scrap materials before committing to your final piece.
- When hanging your new art, try removable wall strips, especially for renters or anyone who likes to rearrange art often.
Mixing and matching these project ideas brings a unique style to your home. The best part is how easy it is to personalize everything, so your wall art feels one of a kind. If you want more ideas or want to show off something you’re proud of, check out the Cricut Design Space community or browse Pinterest for even more inspiration! Also, continue to try new materials and experiment with color combinations and layering techniques to give your projects a fresh feel. Remember to keep old scraps for future use, as bits of cardstock or vinyl can come in handy for small decorative accents or practice cuts. Over time, your skills will improve and your confidence will grow, letting you take on even more eye catching and creative Cricut wall art projects. This sign was created with holographic vinyl and regular vinyl with a little bit of layering. This was one of my first projects!